Introduction
Streamline Payments are available on our Community Pro and Operations Pro packages.
Whether you have existing projects or are looking for new revenue streams, it's never been more important for district's to explore new ways to raise much-needed funds.
Having a donations page on your site is a great way to showcase the great work you do for your community and generate more buy-in from the community, ideally in the most literal sense! However, it's just as important to make sure you're putting your best foot forward by designing a quality donations page and displaying it prominently on your Web site.
Setting up your donation product page
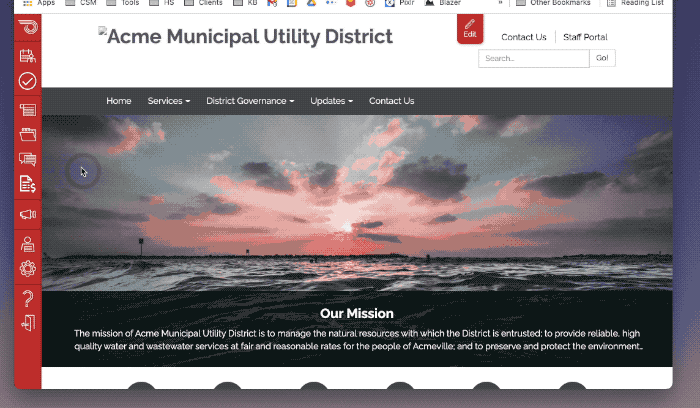
First things first, we need to set up a solid donations page on our Web site. Since anything payment-related requires us to create a Product page, we'll navigate to our Payments tab to get this set up:
Let's begin by setting up this product to work for donations. Here's a configuration we recommend:
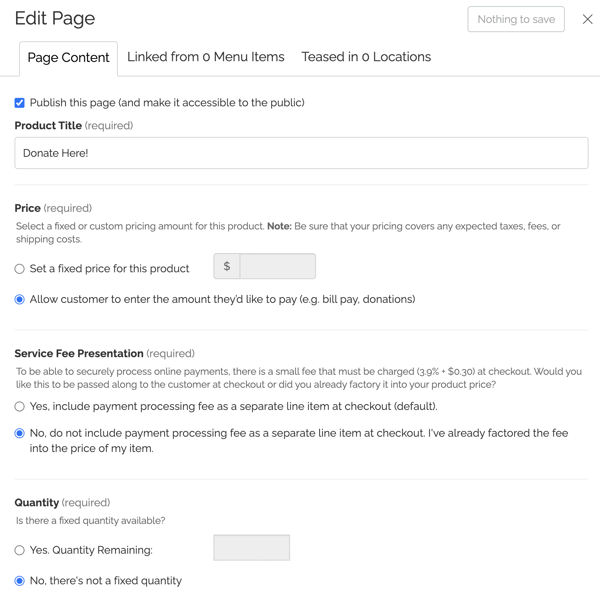
Some points to take away from the title / price / quantity section:
- The "product title" will also serve as the title of the page, so be direct! You'll have more room to explain later
- In the majority of situations you'll want to allow the donor to choose the amount they want to donate.
- Since you likely don't want to limit the donations you can receive, go ahead and choose "there's not a fixed quantity"
Let's continue down the page editor to the Product Description area:
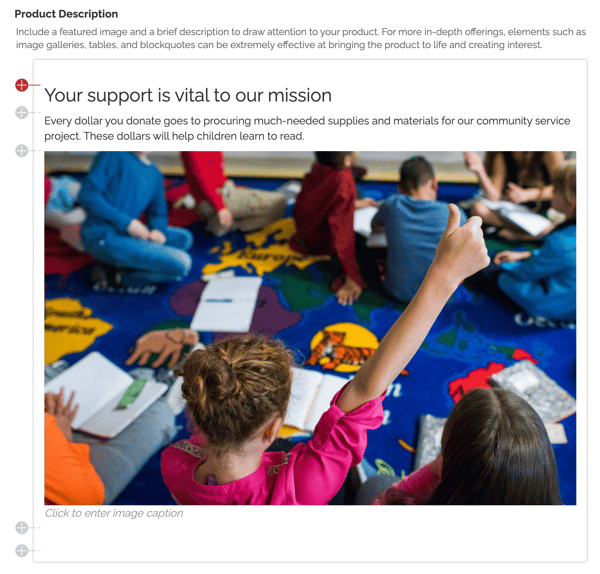
Some points to take away from product description section:
- Take a moment to help educate your donors on the value of their donation here, or use images to provide that immediate impact
- In the language you include, as much as possible, talk in terms of benefits vs simply asking them to "donate now" -- language that appeals to the motivation of the donor is likely to inspire repeat donations
- Including a photo never hurts in helping folks visualize where their money is going. You'll be able to insert Elements like photos, videos, or files to help inform your donors, just like any other page on your site.
Let's continue to the checkout form. Scroll down and click on the Add Checkout Form button, which will bring up the form editor: 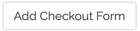
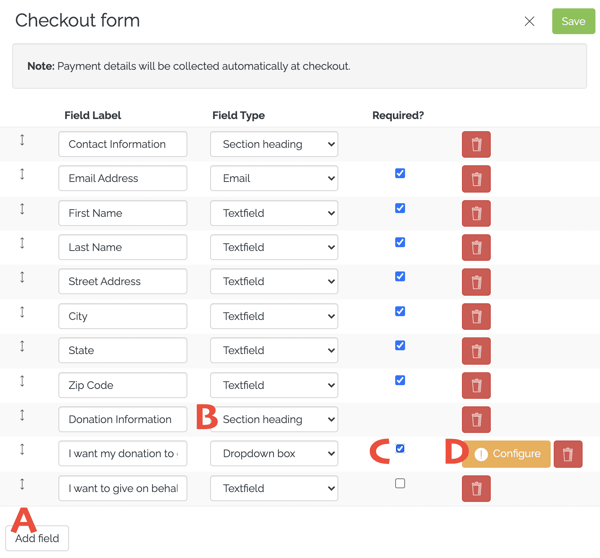
Some points to take away from checkout form:
- You can add fields to the default form by clicking the Add field button (A) in case you need to collect additional info
- Depending on your needs, it's not a bad idea to create a new section for additional donation info by adding a new field (A) and giving that field a type of "Section Heading" (B) -- you'll see later that it organizes the following items into their own section on the checkout form
- Any items you want to include can be made required (or optional) by checking the associated checkbox (C)
- For any field types that have multiple options or where multiple selection is needed, you can configure those options by clicking the orange Configure button (D)
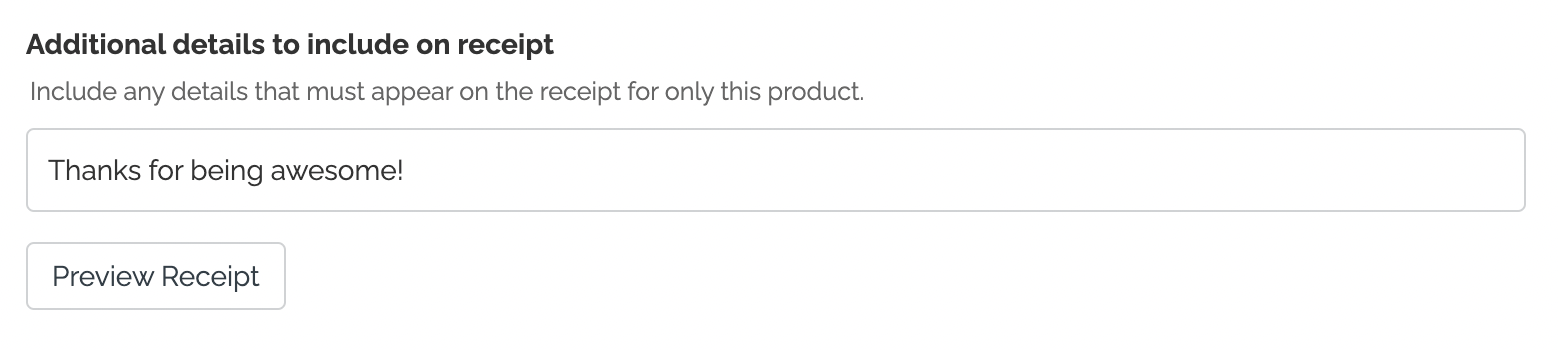
Finally, you can preview the receipt the donor will see and include any additional information for them, such as a thank you or other relevant information:
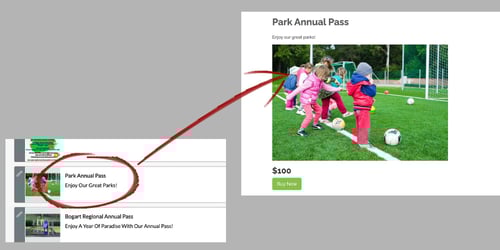
At this point, you're ready to Save and close your product page:  You can check out your new donations page by clicking on the title of the page from your Products tab (here's an example):
Hey! Want to see what this donations page looks like live on a Streamline web site? Click here to check it out >
Now that you have the donations page on your site, you aren't done quite yet. You still have several options to choose from for how to display this page on your Web site or share it across the greater community.
Display your donation page in your menu / on your homepage
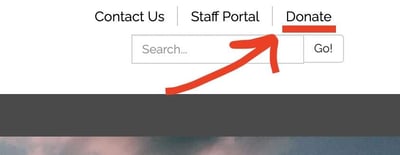
The most commonly sought out real estate for a link to your donations page is the navigation menu. Why? The nav menu appears on every page, and there are multiple sections of the menu you can utilize to make sure it's visible to everyone who might be interested, including a neat little spot just above the search bar:
Check out our other tutorials on the Navigation Menu if you aren't familiar with it!
To accomplish this, navigate to your Menus tab and click on a + icon where you want this new menu item to appear:
Take a second to consider where in the menu you want this to appear. There's no "correct" place to display a donations link, but if you want to add it to the aforementioned spot above the search bar you are looking for the Secondary navigation tab (Menus > Secondary navigation):
-jpg.jpeg)
Display your donation page on your homepage as a teaser
You can also display your donation product page (or any product page) as a teaser on your homepage. Because Products are just like any other Pages on your site, you can tease them on your homepage in exactly the same way.
Check out this tutorial on updating your homepage teasers to learn more about how to do this!