Project purpose
Districts are adapting to a "new normal" for public communication, especially around Board meetings. Gathering and managing public commentary for each meeting's agenda is one such challenge. This project will show you how you can facilitate public comment on agendas using a custom form on your Streamline website.
Project Difficulty: Intermediate
Time to finish: ~15 minutes
Outcome
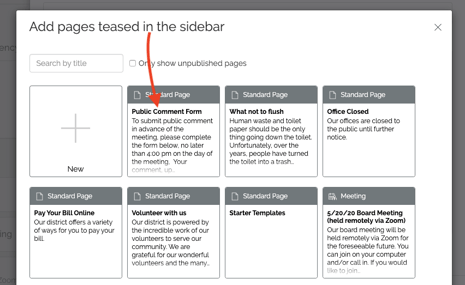
The intended goal of this project is to have a page on your site that features a simple form for public comment on agenda items. This page can be teased (or linked to) on your Meeting pages like so:
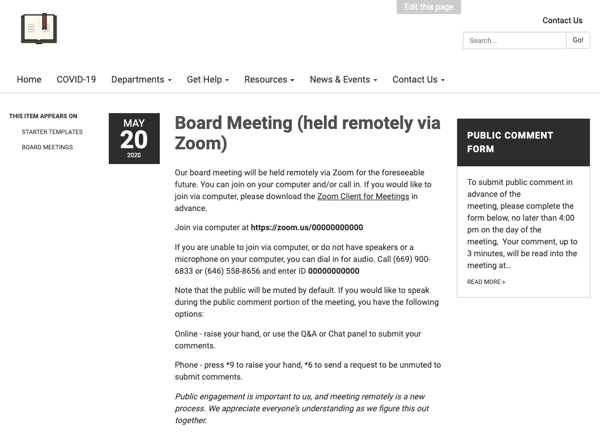
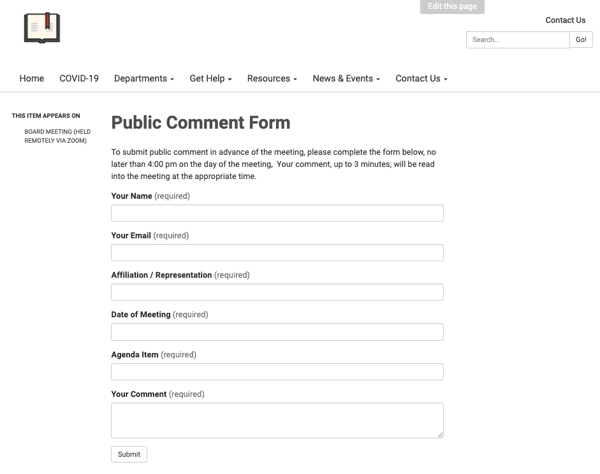
If a visitor is viewing your meeting page, they can click on the "Public Comment Form" teaser to view this page with a form they can submit directly to your website, which we'll create together:
How it's done
We're first going to create the public comment page, and build the form on the page as a form element. Then we'll show you how to tease the comment page on your meeting pages. Finally, we'll show you how to locate and download these comments prior to your board meeting.
Step 1 - Create the comment page
First let's go into our Content tab and create a new page. We'll start by adding a simple title and some introductory text like so:
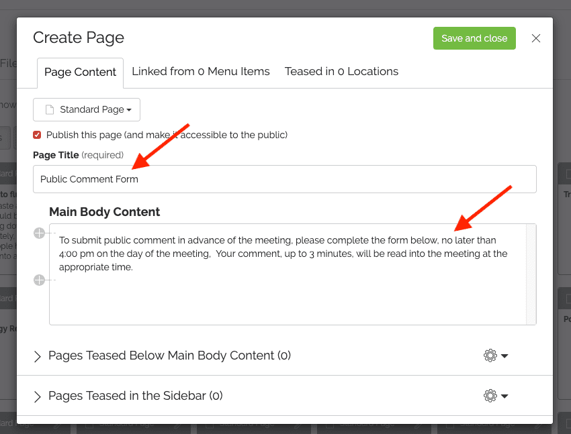
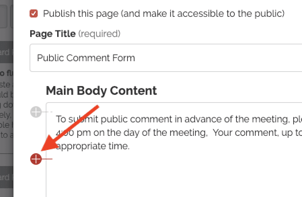
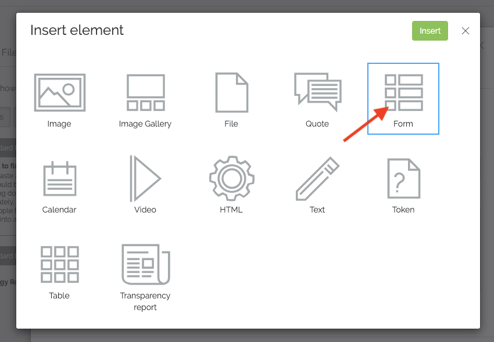
You can -- and should -- customize the text to whatever is appropriate for your meeting / commentary schedule. Once you have the text the way you want, it's time to add a form element to the page. You can do that by clicking on one of the plus icons like so:
And then be sure to choose the form element from the element menu:
Step 2 - Build the form
Once you have chosen the form element, you'll see the Form editor screen appear. You can use this editor to build a form with a variety of field types. Let's start with creating a field for the commenter's name, which we'll label as "Your name":
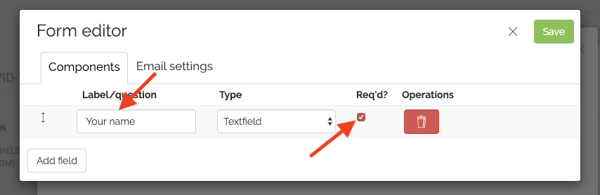
Let's also make sure to check the Req'd? box to ensure that this field has to be filled out for the form to be submitted. When done, click the "Add field" button to add our next field for the commenter's email, which we'll label "Your Email":
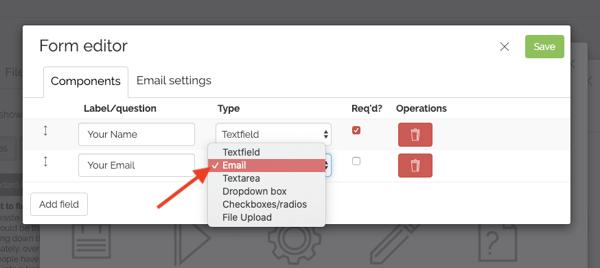
What's important here is to make sure you update the Type of field to be an Email field. This will instruct the form to check that the commenter is entering a validly formatted email before submitting. This should also be required, to reduce the potential for spam and encourage "real" public comments.
We can repeat the process of adding new fields, giving them the appropriate labels and making them required as needed:
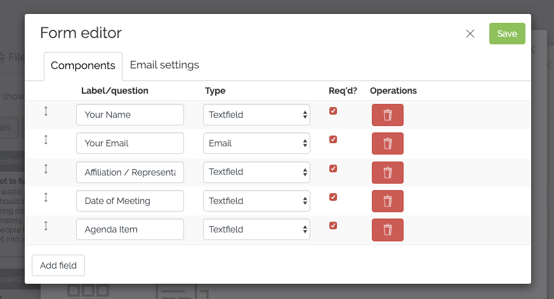
We'll add field for affiliation, agenda item, and date of meeting so that this form can be reused across multiple meeting pages.
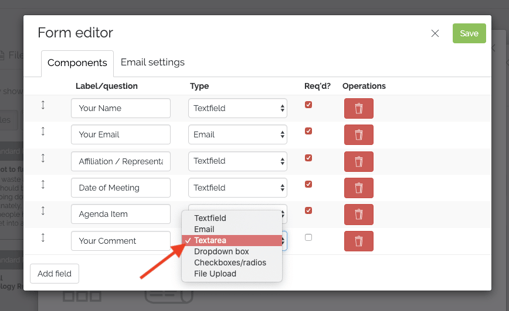
Finally, we need to add a field for the actual comment. To do that, we'll add a field, but make sure to choose the "Textarea" field type as that allows for multi-line entry:
When you're done, you should see something like this:
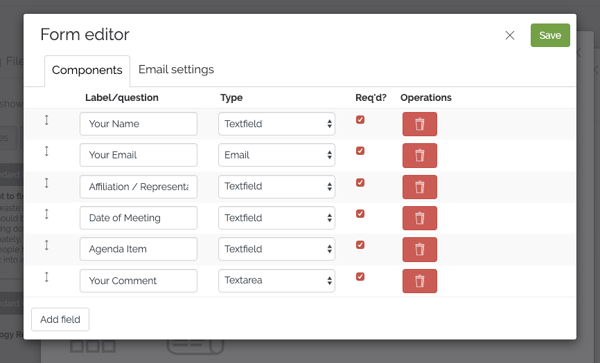
Continue adding other fields or customizing as needed. When done, click the green "Save" button and make sure to Save and close the page itself as well.
Tip: Before moving on, take a moment to click on the "Email settings" tab. There you can set up the email notifications for this particular form. One or more emails can be included here to be alerted whenever a new submission is received:

For more information on forms, check out our reference guide >
Step 3 - Tease the comment page on a meeting page
If you saved the form and the page correctly, you should see a new page in your Content library. While there's a variety of ways to feature this page on your site, we would recommend teasing this page on your Meeting pages.
To tease this page on a meeting, go to the Meetings dashboard and locate your next meeting and click the red pencil icon in the top left corner (or alternatively, you Add a new meeting as well):
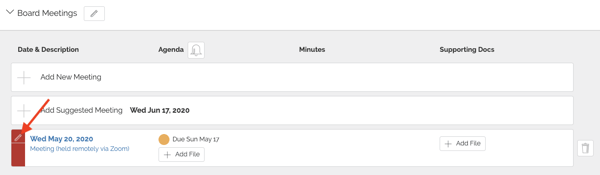
Doing so will bring up the editor for the meeting page:

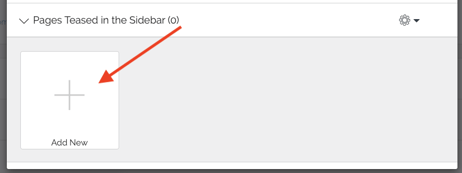
Click to expand the sidebar teaser zone, which should allow you to add a new teaser to this page:
Then make sure to choose from your library the comment page you just created:
Make sure once the teaser is added that you Save and close meeting page. You did it! You should now see the goal outcome we identified above.
Tip: teasers can be added to a variety of locations and are very powerful features of your Streamline site. For more information about teasers, check out our reference guide >
Step 4 - Collect submissions
As submissions come in, notifications will be sent to the emails you added to the form as well as the default contact email in your site preferences.
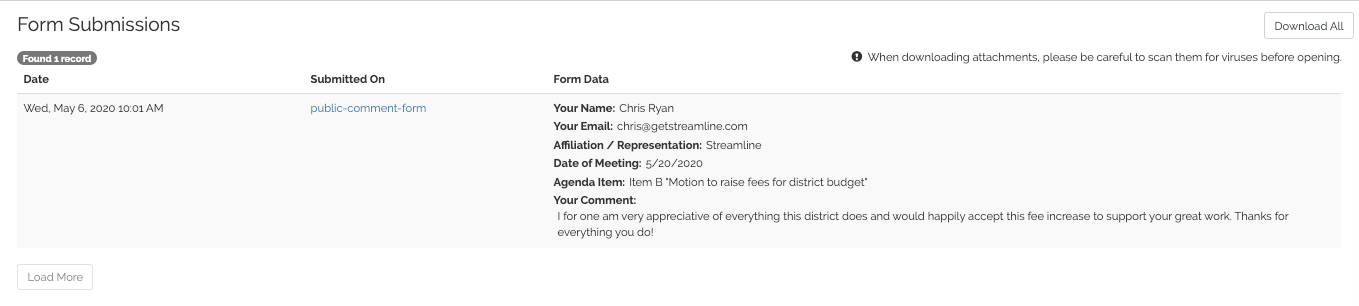
You can also log into your Streamline site and open the Submissions tab, where you can see each submission on a single page, or download them into CSV format. Here is what the submissions page will eventually show, which you can then collect prior to the meeting:
Conclusion
We hope this was helpful! If you have any questions, reach out to us at support@getstreamline.com!
Hat tip to Karen Hewitt from Port of Newport for the inspiration for this project!